Setting up Robolytix service in Blue Prism
You can integrate our Robolytix platform into any RPA tool. You will be able to monitor and analyze your processes and robots. This guide will help you to set up Robolytix in the Blue Prism environment. There are several ways, how to integrate sending Sonar messages. The easiest is calling directly our API.
This guide creates a new Web API Service in Blue Prism. You can import packages with pre-configured service in simplified Setting Robolytix in Blue Prism walkthrough.
Prerequisites
This guide has a few prerequisites. When you are just starting with Robolytix, you must perform some basic steps.
- Create a Robolytix account at our website
- Create a new process in Robolytix
- Obtain API key
Overview of this walkthrough
Setting a new Web API Service
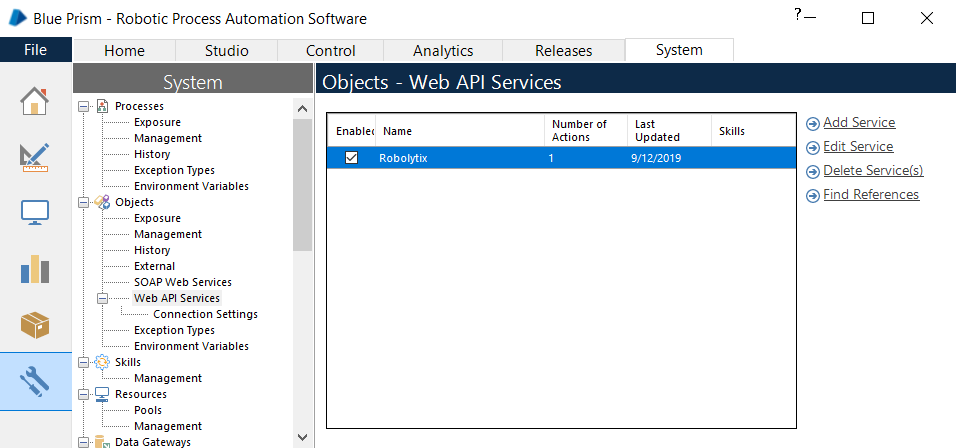
The first step is to create a new service in the System tab. In your left menu, there is an object called Web API Services. You can click on the Add service button after selecting this object.
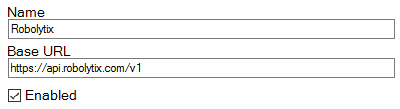
There are a few main parameters, you must set up. In the first dialog add a name to this service and set Base URL to https://api.robolytix.com/v1.
Add two new headers in corresponding section Common Headers from the left menu:
- Content-Type application/json
- Authorization <YOUR API KEY>

Create new action
There is only one action we need to create. From the left menu click on the button Add Action and name this action (e.g. Sonar).

This action has several parameters that connect your process with the proper process in Robolytix. Each parameter must be exposed and has type Text. All parameters are described in Sonar Message Structure. They are processid, sonarid, runid, name, and type.
In the next menu, Requests set Method of request to POST, URL Path to /messages and Body Content to the template with the following structure.
{
     "processid": "[processid]",
     "runid": "[runid]",
     "service": "BluePrism",
     "name": "[name]",
     "type": "[type]"
 }
Call web service
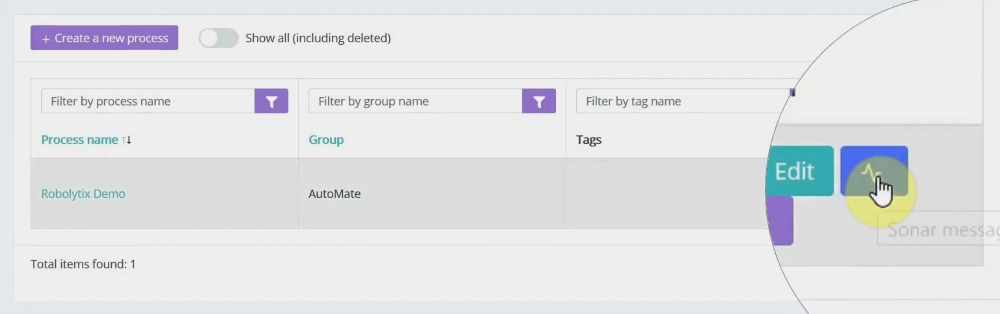
Edit your process and add previously created action in Process Studio.
- Open process or create a new one in Process Studio
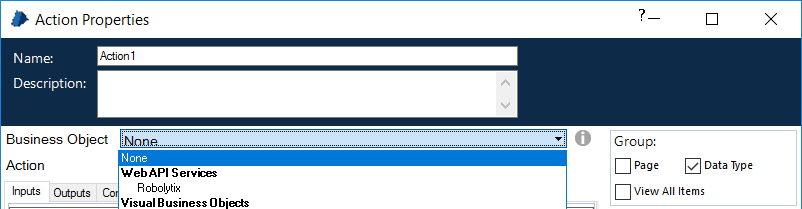
- Add new action from the left menu (into flowchart)
- Set type of action to Robolytix: Sonar (or your custom names)
- Connect action to process flow with links
- Set action parameters according to Sonar Message Structure description.
There are two parameters that should be defied at the start of the process.
- processid - this parameter is constant for all sonars in one process. It should be set only once at the beginning of the process.
- runid - this parameter represents the unique identification of one process run. It should be set to a random value at the beginning of the process. Good choices are current timestamp or new generated GUID.
Show your data in Robolytix
All configuration is done. Now you should run your process. After proper process execution goes to the Robolytix platform and check up process statistics. It is possible to show all recent messages sent to the specified process. Go to Settings -> Processes menu and select a list of process messages.


Stay in touch